

No data migration
Keep S3 as the source of truth. RedBrick stores the metadata needed for discovery and search.
One datapoint per study
Instances are grouped by
SeriesInstanceUID, then into a study by StudyInstanceUID.Automatic updates
Weekly scans reconcile the bucket. Optional S3 access logs provide daily change detection.
What you will set up
This guide takes you through four steps:- Give RedBrick read-only access to your source bucket.
- Create an S3 storage integration in RedBrick.
- Connect that integration to a Workspace.
- Optionally enable S3 access logs for daily updates.
1. Give RedBrick access to the source bucket
RedBrick needs to list objects and read DICOM files. It does not need permission to upload, modify, or delete source data.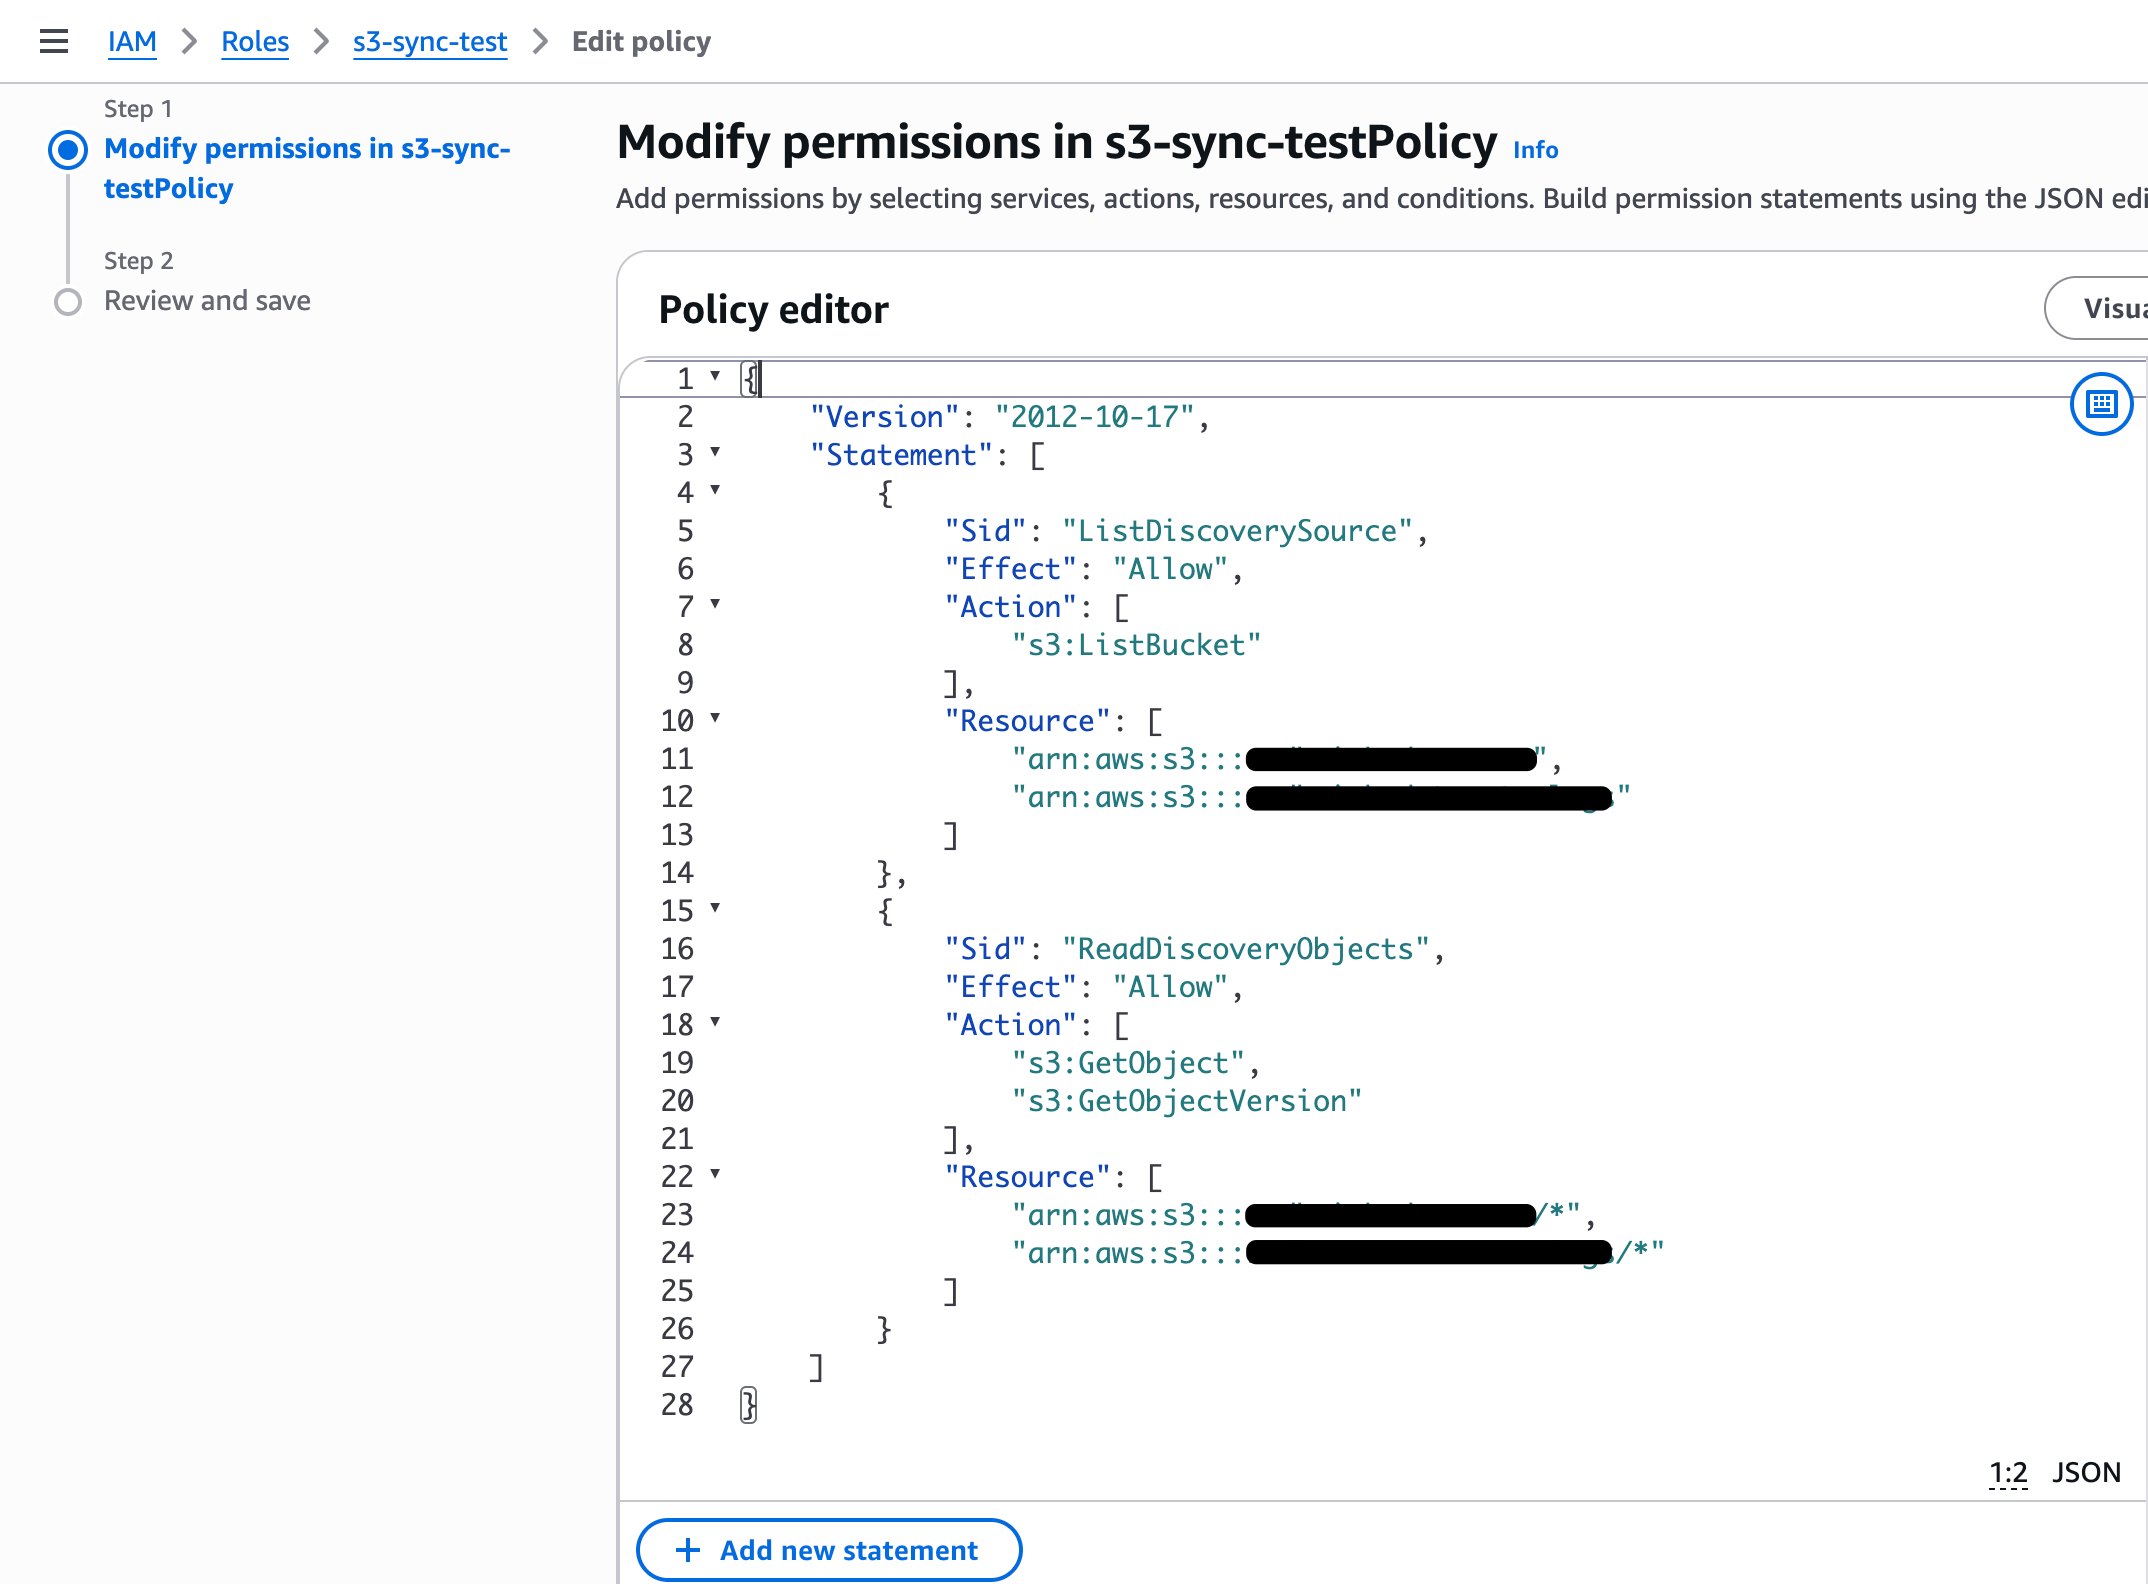
YOUR-SOURCE-BUCKET with the bucket name.
If the bucket uses SSE-KMS
If objects are encrypted with a customer-managed AWS KMS key, also allow the integration role to decrypt with that key. Replace the placeholders below and ensure the KMS key policy also permits the role.Role-based access or access keys?
Role-based access is recommended because it uses temporary credentials.- IAM role (recommended)
- Access and secret keys
- Public bucket
- Create an IAM role in the AWS account that owns the bucket.
- Attach the read-only policy above to the role.
- In RedBrick, begin creating an AWS S3 storage integration and select role-based credentials.
- Copy the trust relationship displayed by RedBrick into the role’s Trust relationships tab in AWS.
- Copy the role ARN into RedBrick and verify the integration.
2. Create the S3 storage integration
1
Open Integrations
In RedBrick, open Integrations, select Storage, and choose New storage method.
2
Choose Amazon S3
Enter a recognizable name, the source bucket, its AWS Region, and the credentials configured in
the previous step.
3
Verify access
Save and verify the integration. If verification fails, confirm the bucket name, Region, role
trust policy, external ID, and
s3:GetObject permission.3. Connect the bucket to a Workspace
1
Open the Workspace
Open the Workspace that should receive the studies and select the Discovery tab.
2
Connect storage
Select Connect storage and choose the S3 integration created above.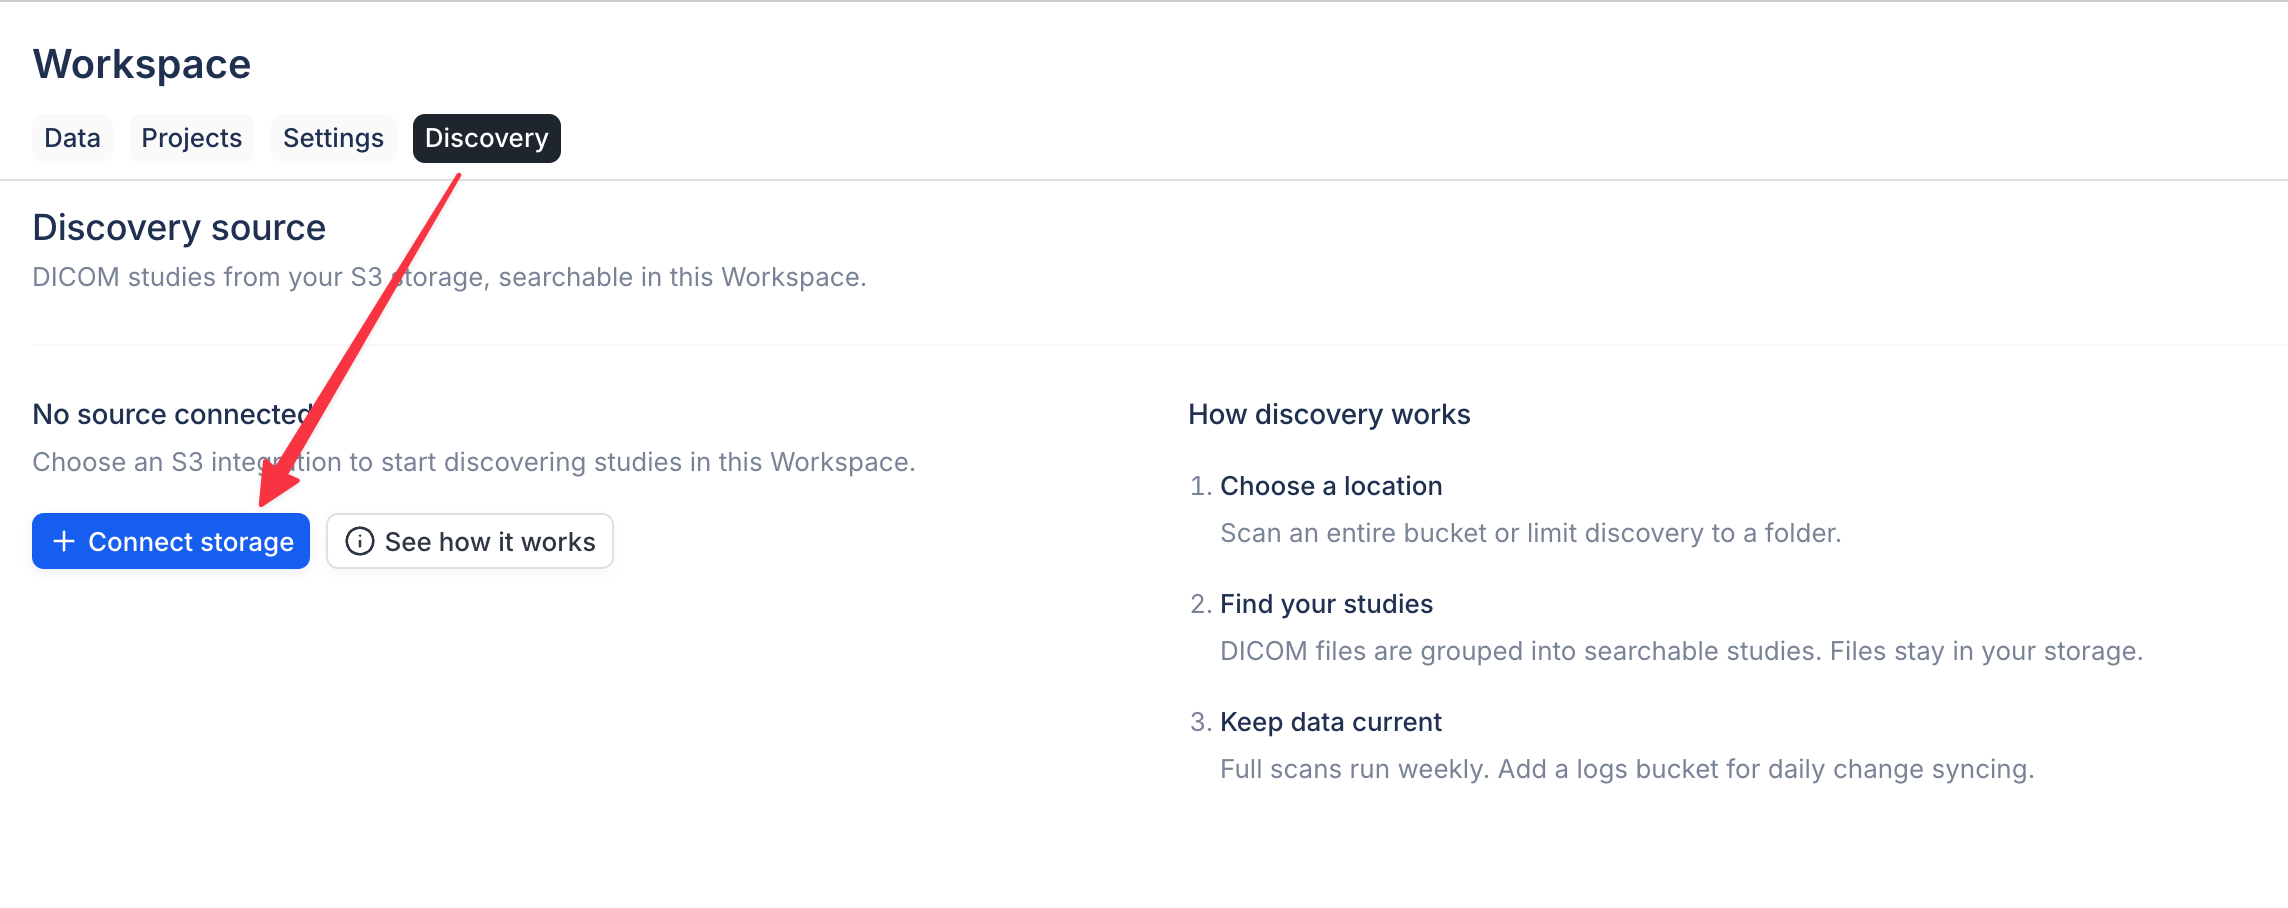
3
Choose an optional folder
Leave the folder empty to scan the entire bucket, or enter a prefix such as 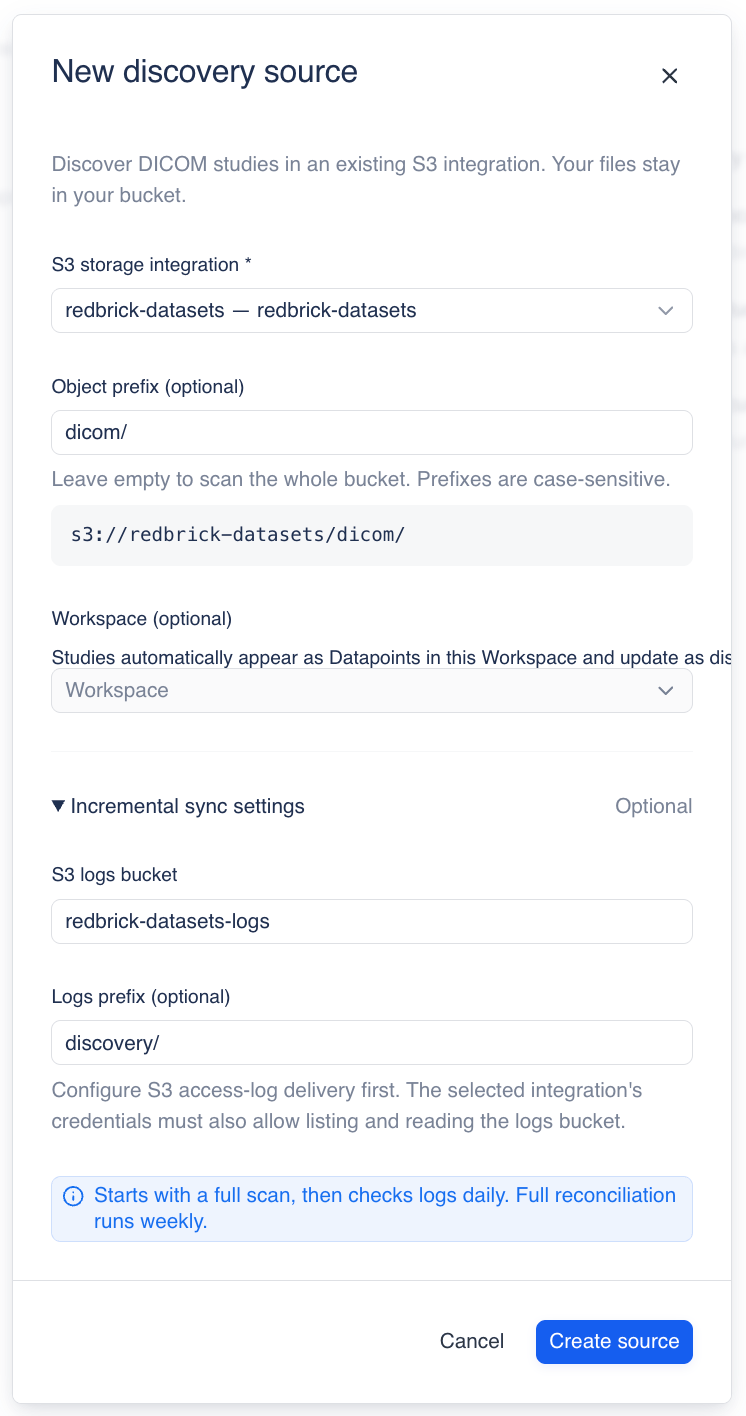
dicom/2026/. Do
not include s3:// or the bucket name.4
Start discovery
Create the source. RedBrick immediately schedules a full scan. Studies appear in the Workspace
Data tab as they finish processing; you do not need to wait for the entire bucket to finish.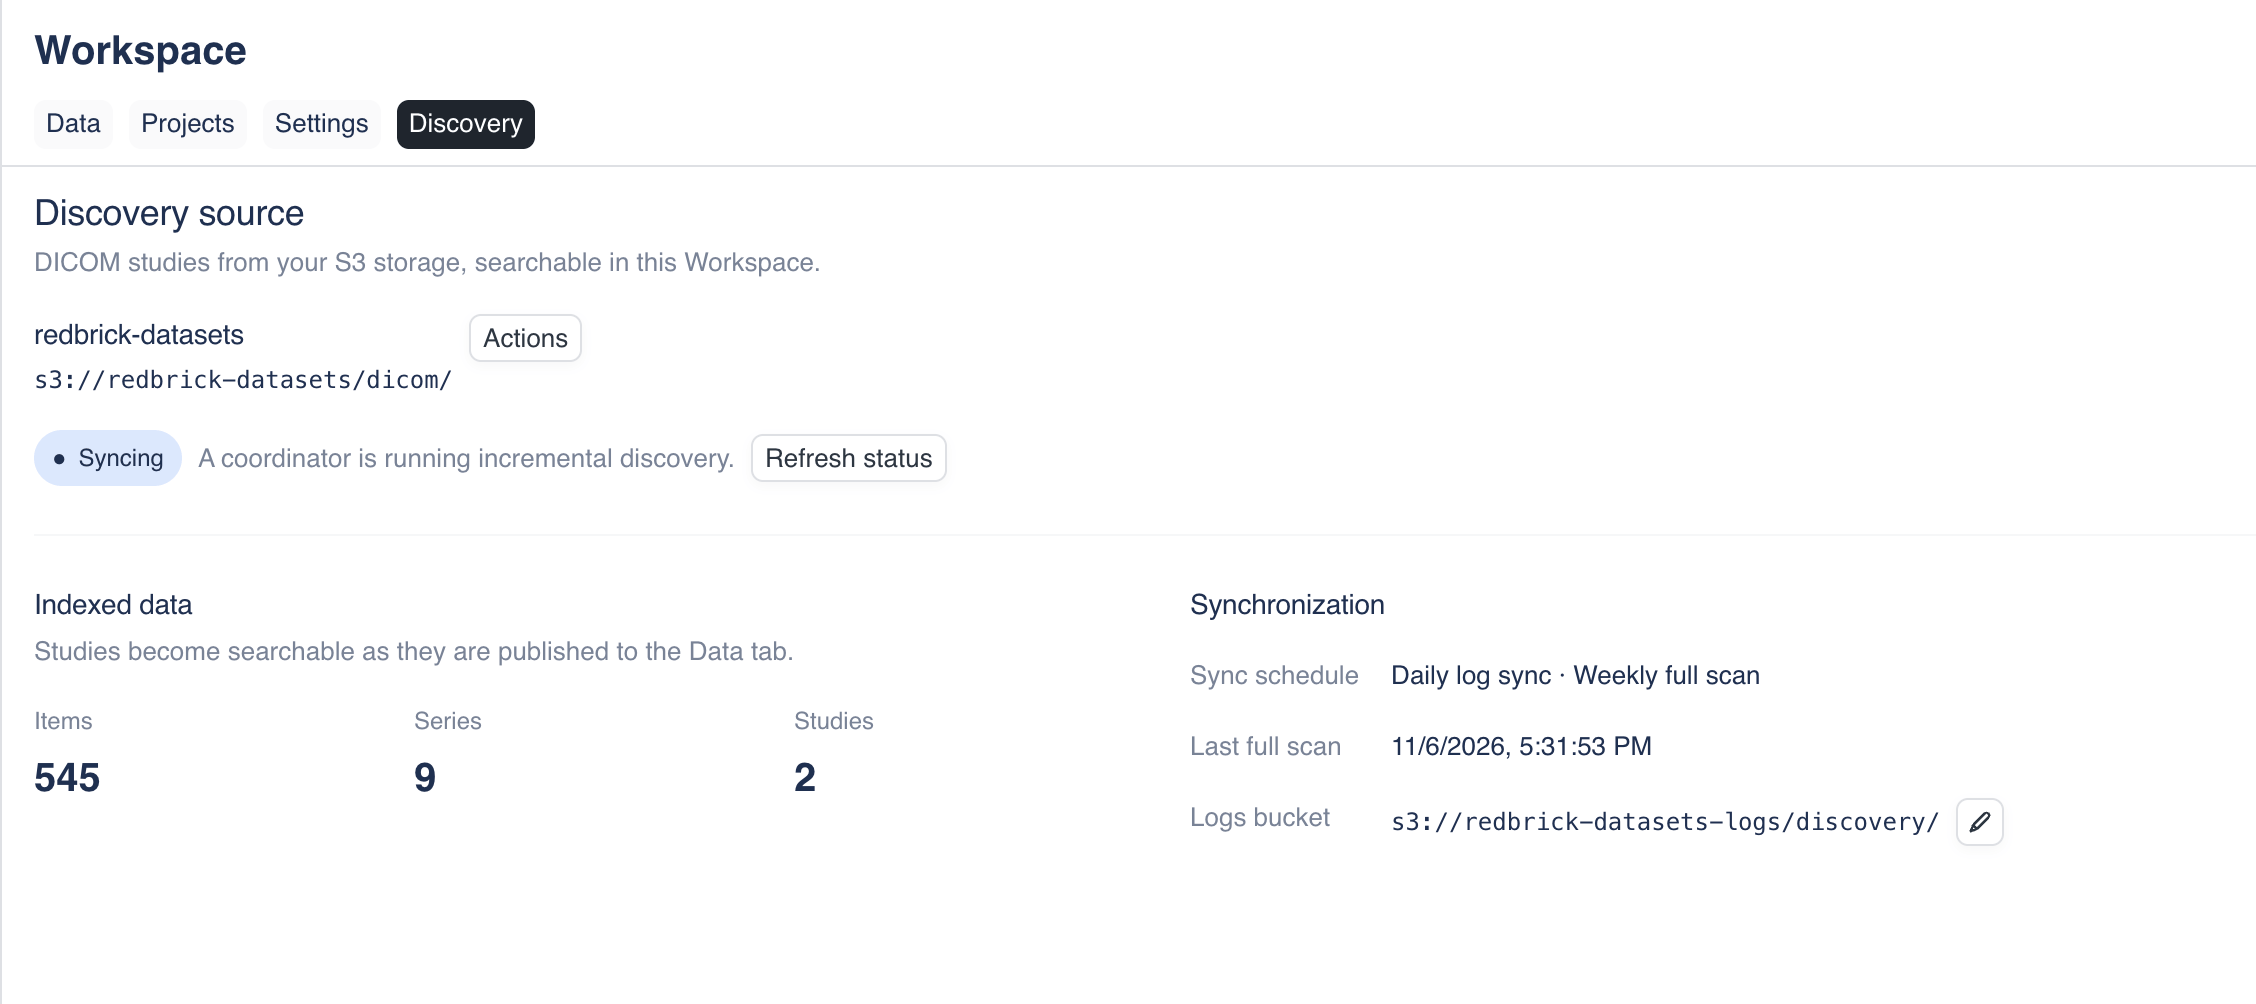
Setup is working when the Discovery tab shows indexed item, series, and study counts. For a large
bucket, these counts increase while the scan is running.
4. Enable daily updates with S3 access logs
This step is optional. Without access logs, the weekly full scan still detects additions, modifications, renames, and deletions. With access logs configured, Discovery also processes relevant changes daily.Create or choose a logs bucket
Use a separate bucket in the same AWS account and Region as the source bucket. Choose a dedicated prefix such asdiscovery/.
In the AWS S3 console:
- Open the source bucket.
- Select Properties → Server access logging → Edit.
- Enable logging and select the destination logs bucket.
- Enter a destination prefix, for example
discovery/. - Save changes.
AWS recommends a bucket policy instead of ACLs for log delivery. Use Amazon S3 managed encryption
(SSE-S3) for the logs bucket; AWS warns that server access log delivery can be incompatible with
default SSE-KMS encryption on the destination. See AWS’s server access logging
guide
for the current destination-bucket requirements.
Let RedBrick read the logs
The same role or IAM user used by the source storage integration must be able to list and read the logs location. Add these statements to its IAM policy:- Bucket:
YOUR-LOGS-BUCKET - Prefix:
discovery/
What happens when files change?
Discovery never treats an access error as a deletion. A file is marked deleted only after a complete successful full scan confirms that the key is absent.
Monitor the first scan
The Workspace Discovery tab shows:- Current status and pending retries.
- Indexed item, series, and study counts.
- The last completed full scan.
- Whether daily log sync is configured.
- Actions to refresh status, start a full scan or log sync, and retry failed files.
Indexing and Workspace publication run independently. On a large source, the study count can grow
faster than the Workspace datapoint count while publication catches up.
Troubleshooting checklist
Access denied for every object
- Confirm the role trust relationship contains the RedBrick principal and correct external ID.
- Confirm
s3:ListBuckettargets the bucket ARN without/*. - Confirm
s3:GetObjectands3:GetObjectVersiontarget the object ARN with/*. - Check bucket policies, organization service control policies, and VPC endpoint policies for explicit denies.
Access denied for only some objects
- Check whether the object keys fall outside the permitted prefix.
- Check whether those objects use a different KMS key.
- Check object ownership and any object-specific ACLs on older buckets.
- For public integrations, verify the failing object with an unsigned request, not with your local AWS credentials.
No daily changes appear
- Confirm AWS is writing objects under the configured logs prefix.
- Confirm the integration role can list and read that prefix.
- Remember that S3 server access log delivery is best effort and can be delayed; the weekly full scan remains the final reconciliation mechanism.